Assemblr Edu Guide
Visit Assemblr Edu
English
English
  • Hello!
  • Getting Started on Assemblr Edu
    • What is Assemblr Edu?
    • Tech Check!
    • Signing Up in Assemblr EDU
    • Signing In to Assemblr EDU
    • Email Verification
    • Account Login Limitation
  • Assemblr EDU Main Feature
    • Topics
    • Edu Kits
    • Editor
    • Classroom
  • Creation Guideline
    • Warm Up Activity
    • Core Activity
    • Student's Activity
  • Introduction to 3D/AR Editor
    • 3D/AR Creator Dashboard
    • Custom Marker Dashboard
  • Assemblr Edu Main Menu
    • Navigation Bar
    • Project Dashboard
    • AR Markers Dashboard
    • Account Dashboard
    • Marketplace Page
    • Discover Page
  • Create Projects
    • Create Project Using Super Simple Editor
    • Create Project Using Default Editor
  • Assemblr Edu Editor
    • Introduction to Editor
    • Super Simple Editor
    • On-Screen Display Settings
    • Multi-Select Objects
    • Change Background Color
    • Insert 3D & 2D Objects
    • Insert Texts & Annotations
    • Insert Videos & Audio
    • Transform Tools on Editor
      • How to Move Objects
      • How to Rotate Objects
      • How to Scale Objects
      • How to Duplicate Objects
      • How to Mirror Objects
      • How to Copy Objects to Another Scene
      • How to Delete Objects
      • How to Edit Objects on the Transform Panel
      • How to Change Objects on the Transform Panel
    • Scene Feature
      • How to Add, Duplicate, and Remove Scenes
      • How to Set Scene Camera
    • Interactivity Feature
      • Animate (Move, Rotate, Scale, Animation)
      • Visibility (Hide & Show)
      • Jump Up (Switch Scene & Open URL)
      • Media (Video Control & Sound Effect)
  • Custom AR Markers
    • What Is Custom AR Marker?
    • How to Insert Custom AR Markers from the Editor
    • How to Insert Custom AR Markers from AR Marker Dashboard
    • How to Purchase Custom AR Markers
  • Preview & Publish Projects
    • How to Preview Your Project
    • How to Publish Your Project
  • Share Projects
    • Share Project's Link
    • Share Project's Embed Code
    • Share AR Markers
    • Embed in Canva
  • View Projects
    • View on Web Browser
    • View on Assemblr Edu App
  • Assemblr Marketplace
    • What Is Assemblr Marketplace?
  • Plans & Pricing
    • Assemblr Edu Subscription Plans
    • BLR Coin
  • Redeem Vouchers
    • How to Redeem Vouchers
Powered by GitBook
On this page
  • Getting Started
  • A Joyful learning for Warm Up or Ice Breaking Activity
  • Stimulate Motor Skills
  • Use Animated 3D Objects
  • Audio Input
  • Images Storytelling
  • 2D Object
  • Set Camera
  • Simple yet Stunning Project’s Visual
  • Text
  1. Creation Guideline

Warm Up Activity

PreviousClassroomNextCore Activity

Getting Started

In this section, you will learn how to create a 3D/AR project for the learning process. These guidelines will help you plan fun and engaging learning experiences for your students. It will also introduce you to the 'Joyful Learning' teaching method, ideal for warm-up or ice-breaking activities.

Note: These guidelines are provided for reference in creating 3D/AR projects. Feel free to be creative and design projects based on your preferences!

Let’s learn how to enrich your learning experiences! ✨

  1. Fill in the e-mail address and password of your Facebook account. Then, click Log In.

  2. To proceed, just confirm your identity. You're all set!

A Joyful learning for Warm Up or Ice Breaking Activity

Stimulate Motor Skills

to stimulate students’ motor skills using AR, you can use these tips:
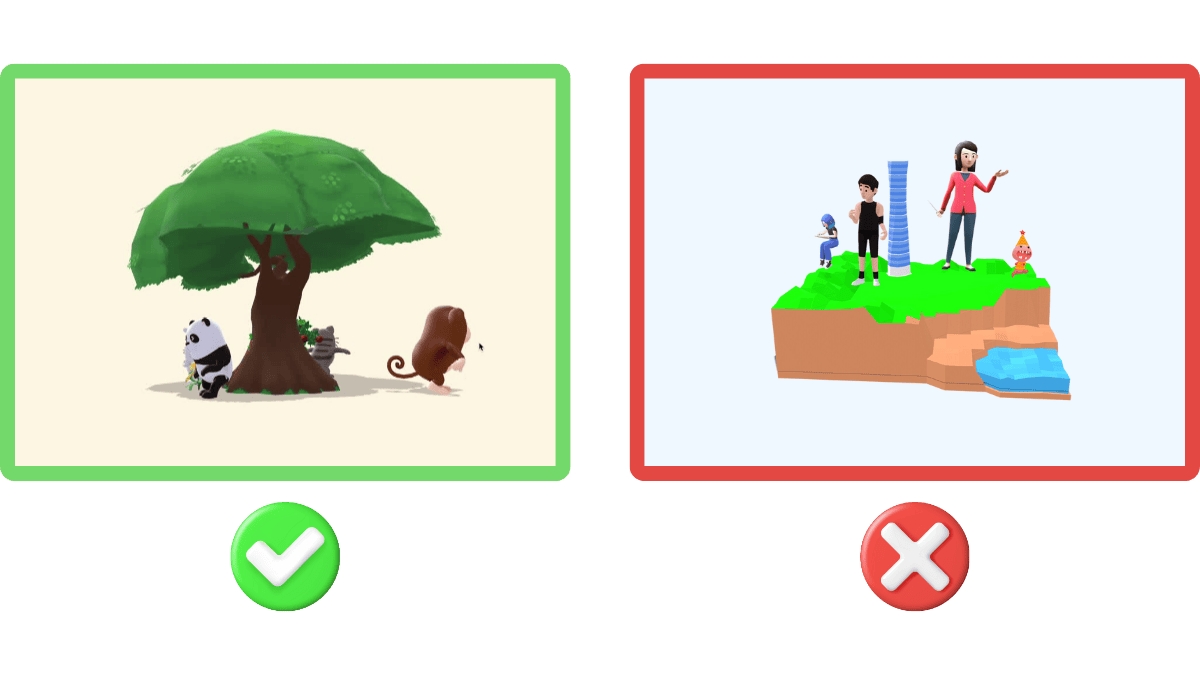
Use Animated 3D Objects

  • Incorporate various animated 3D objects to engage students and promote gross motor skill practice.

  • Choose objects that align with your project’s theme.

Audio Input

  • Input music to your project to create a lively and enjoyable classroom atmosphere.

Images Storytelling

Create an engaging animated storytelling projects, with these tips:
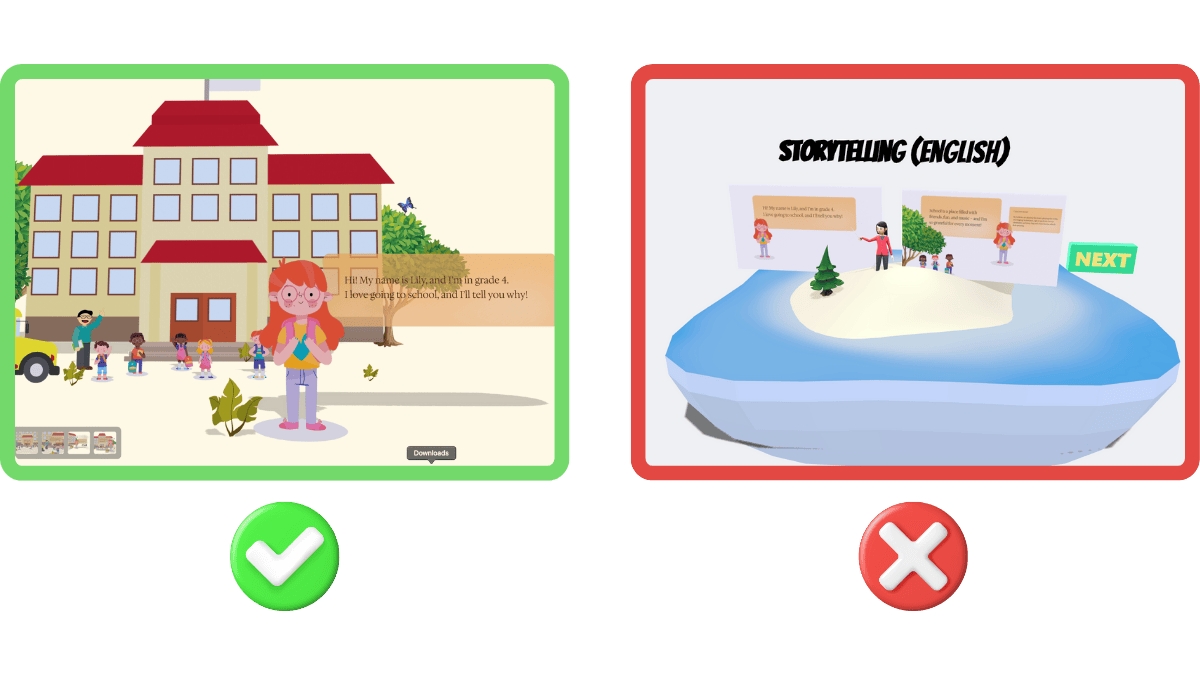
2D Object

  • Use 2D objects without limitations! Customize designs to match your lesson’s objectives.

  • Remember to avoid using files larger than 1MB to maintain project performance. Heavy files can cause errors and slow down your project.

Set Camera

  • Adjust the camera perspective for a smooth viewing experience. To set the camera, use the “Scene” feature. Select the scene, click “Set Camera,” and position it as needed. Once set, your project will align with the chosen perspective.

Simple yet Stunning Project’s Visual

to create a simple yet stunning visual in your project, use these tips:
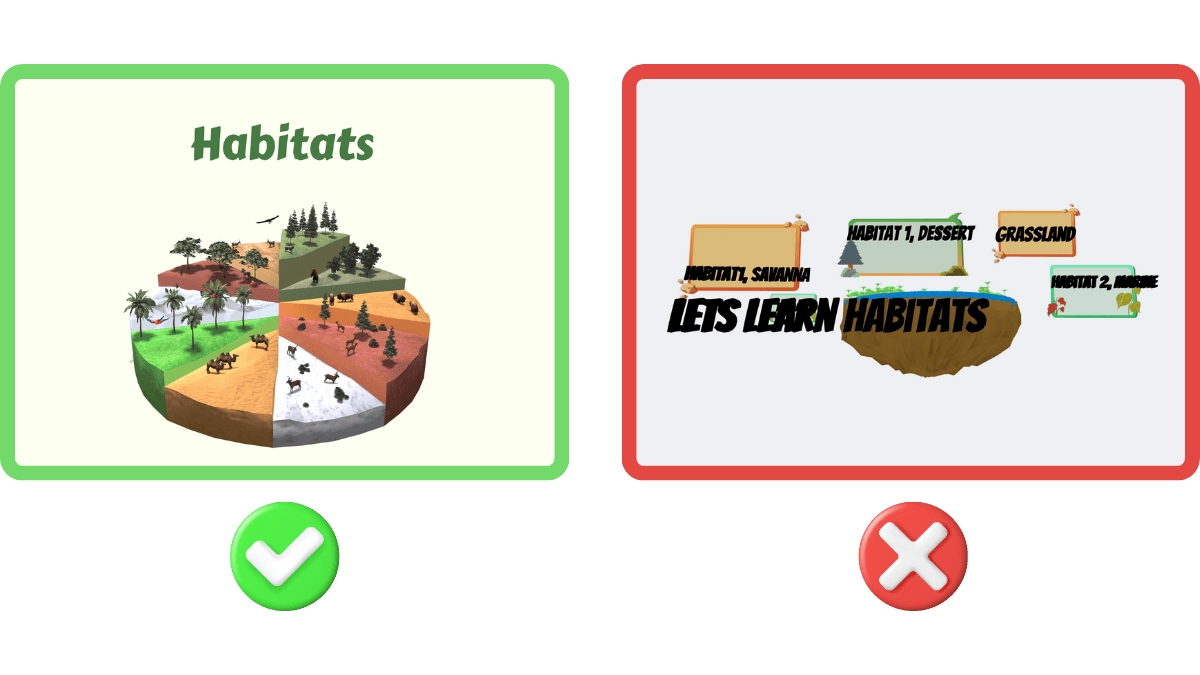
Text

  • Add texts sparingly to avoid overwhelming the screen. Use 3D text with minimal extrusions to prevent cluttered visuals.

  • For a cleaner look, consider importing text from design platforms like Canva or Figma.